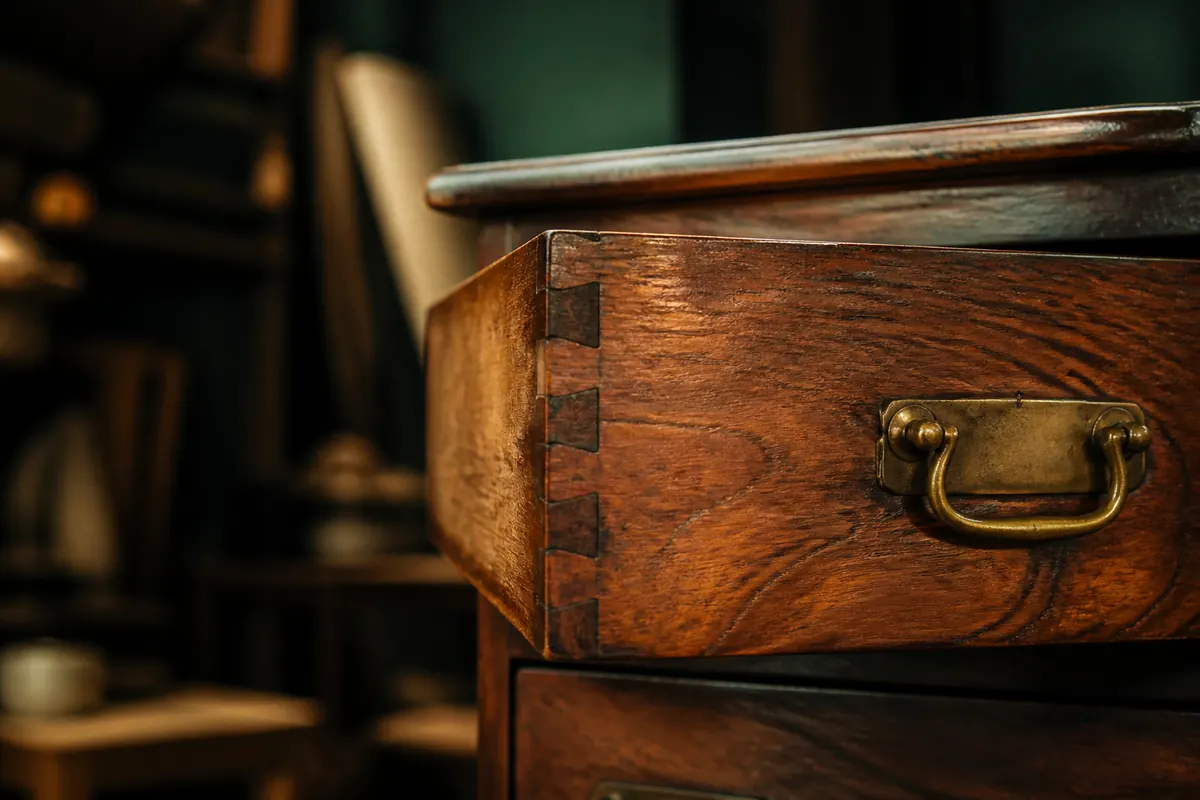
Quick answer: Antique furniture is identified by a conversation between its parts. A label may point toward a maker, but joinery, fasteners, wood, hardware, finish, wear, and repairs must tell a compatible story before you trust the attribution. Use the steps below to collect evidence before you search for an exact maker, date, or value.
Find the marks before you move the furniture
Begin with a careful visual inspection and photograph the piece in place. Labels and marks are commonly hidden inside drawers, beneath a tabletop, on the back of a case, under a chair seat, inside a cabinet door, or on a stretcher. Do not turn a heavy or fragile object alone just to find a mark. A small torch held at a low angle can reveal impressions without aggressive cleaning.
Write down the exact wording, punctuation, symbols, numbers, and location of a mark. A partial label can still be useful when paired with construction evidence. Note whether the mark is printed, stamped, stenciled, handwritten, impressed, branded, or attached as a paper label. Different methods can belong to different production periods, but none should be used in isolation.
An old-looking label does not automatically prove that the entire piece was made by the named company. Furniture can be relabeled, retailed by a different firm, assembled from older parts, or copied decades later. Treat the label as a lead to verify.
Study joinery where it is easiest to see
Drawers are often the best starting point because their corners reveal how a cabinet was built. Look at the shape and regularity of dovetails, the thickness of the pins and tails, saw marks, glue blocks, and whether the drawer bottom is fitted in a groove. Hand work can be irregular, but irregularity alone is not proof of great age: hand tools continued to be used after machines became common, and modern makers can distress new work.
Inspect mortise-and-tenon joints, wooden pegs, corner blocks, and the way legs meet rails. Ask whether the joinery is consistent across the whole piece. A chair with convincingly old front legs but newer, machine-made rear construction may have been repaired or rebuilt. That is important information, not automatically a reason to dismiss it.
Look for the evidence of how the wood was cut. Straight, circular, or irregular saw marks can help narrow a manufacturing context, but they must be interpreted alongside the furniture’s geography and construction. A single saw mark is easy to misread under a dark finish or modern restoration.
- Photograph drawer corners from above and below if accessible.
- Check whether dovetails are hand-shaped, machine-cut, or altered.
- Look for tool marks on hidden surfaces, not only the decorative front.
- Compare joinery on both sides of the same piece for consistency.
Date hardware carefully
Hinges, locks, screws, nails, pulls, casters, and escutcheons can be valuable dating clues. Compare their shape, manufacturing marks, attachment method, and wear to the furniture around them. A replacement pull can make an old drawer look newer; a salvaged old pull can make a newer piece look older. Look for filled holes, changed screw positions, shadows in the finish, and different wear beneath the hardware.
Screws should be read with caution. Older screws may show hand-filed heads, uneven slots, or less standardized threads, while later machine-made examples tend to be more uniform. These are broad clues rather than a universal cutoff because manufacturing methods overlapped by region and use. Never assign a precise date from a single screw.
Furniture often travels through repair shops and family homes. Hardware can be replaced because it broke, because fashion changed, or because a restorer wanted a complete-looking set. Photograph the hardware and the surrounding wood so the relationship can be evaluated later.
Separate wood, finish, and style from authenticity
Wood species can help, but a wood name is not an age certificate. Mahogany, walnut, oak, pine, and other woods were used across long periods and in many regions. Examine the grain, secondary woods, veneers, edge construction, and whether the material makes sense for the object’s supposed origin. A modern reproduction can use an old-looking species, while an original piece may contain later replacement boards.
Finish and patina are equally easy to overvalue. Natural wear usually occurs on edges, handles, feet, and contact points, while artificial distressing can appear random or overly uniform. Watch for finish pooling in recesses, fresh tool marks under old color, sharp unworn edges, and a mismatch between the exterior and hidden surfaces. Do not sand, strip, polish, or scrape a possible antique before it is documented; those actions can remove evidence and reduce value.
Style helps you describe a piece and find comparable examples, but a style revival may be much later than the original period. Use style as one layer in a chain of evidence that includes construction, materials, marks, condition, and provenance.
Use photos to create a better research brief
If you use Antique Identifier or ask a furniture specialist for an opinion, give them enough context to work with. Upload a straight-on full view, a view of the back and underside, close-ups of joinery and hardware, the maker’s mark, and any damage. Include dimensions and tell the reviewer what is original, replaced, or uncertain.
A photo-based result can help name a likely style, object type, or period range and point you toward the most informative next image. It should not replace a physical inspection when the piece is valuable or the question is authenticity. Save the result with your original photographs so your research remains traceable.
For buying or selling, turn the identification into a practical decision. Compare completed sales rather than only asking prices, account for transport and platform fees, and describe repairs honestly. A realistic listing supported by clear evidence earns more trust than a dramatic but unsupported attribution.
Furniture inspection checklist
Use this checklist before you call a piece rare, original, or valuable. The goal is to collect evidence, not to force a conclusion.
- Photograph every label, stamp, chalk mark, and handwritten number exactly as found.
- Inspect drawers, backs, undersides, stretchers, feet, and cabinet interiors.
- Compare joinery, wood, hardware, and finish across the entire piece.
- Look for replacements, filled holes, fresh screws, veneer patches, and refinishing.
- Record dimensions, moving parts, provenance documents, and known family history.
- Use a qualified specialist for insurance, estate, legal, or high-value decisions.
Separate style from construction
Furniture research becomes more reliable when style and construction are recorded as separate observations. A cabriole leg, floral carving, or dark finish may suggest a period, but those features can be copied for decades. Note the physical evidence independently: how the drawer is joined, how the back is attached, whether the wood matches inside and out, and whether the hardware sits in original holes.
Look for a consistent story across the piece. A cabinet with old-looking boards but fresh machine screws may have been repaired or assembled from older parts. A later finish can hide useful evidence, while a replacement foot or veneer patch can explain why one area looks different. These observations do not automatically make a piece less interesting; they make the description more accurate.
When you research a maker, search both the mark and the construction. Compare documented examples from museums, specialist books, auction archives, and reputable dealers. Save the examples that show the same joinery or hardware, not only the examples with similar decoration. This gives a future buyer or appraiser a clearer path to review your conclusion.
Measurements are especially helpful for furniture because photographs compress scale. Record the overall height, width, depth, seat height, drawer dimensions, and any unusual proportions. Compare those measurements with catalogues or sold examples, but allow for regional variation and later alterations. A close match in dimensions is supporting evidence, not proof that two pieces share a maker.
Furniture also carries evidence in its relationship to a room. Note whether the proportions, wear, fading, handle placement, and polished areas make sense for the claimed use. A desk used daily may show different wear from a cabinet kept in a formal room. These details cannot date a piece by themselves, but they can expose an overconfident description and help a specialist understand how the object was used.
Take the next photo with Antique Identifier.
Scan a find on Android or iPhone to get a first-pass identification, age clues, history, and an indicative value range for your research.


Questions collectors ask
Do hand-cut dovetails prove furniture is antique?
No. Hand-cut dovetails are useful construction evidence, but hand tools continued to be used after mechanization and modern furniture can imitate older joinery. Check the entire piece.
Where should I look for an antique furniture maker mark?
Check drawer interiors and bottoms, the back, underside, cabinet interiors, chair seats, stretchers, and areas hidden by hardware. Photograph the mark and its location.
Should I strip old furniture to see the wood?
Do not strip, sand, or aggressively clean a possible antique before documenting and researching it. Removing an original finish can destroy evidence and affect value.
Useful research tools
Research note: Photo-based results and calculators are for discovery and planning. They are not formal appraisals, authenticity certificates, insurance reports, or guarantees of a sale price. Read the valuation disclaimer.